")
")
Fuel Pressure Gauge Kit
(Low Pressure Only/Liquid Gauge)
If you are running a Weber carburetor on your Toyota truck, this kit is a must-have and a great way to keep your fuel system running right. Weber carbs work best in the 2.5-3psi range. This kit provides you everything you need to dial in the fuel pressure accurately to help your carburetor perform at its peak.
This kit includes a genuine Weber regulator, custom made in the USA fuel line "T" fitting and a quality low-pressure gauge so you will know exactly how much pressure your fuel system is delivering to your carb, and this is very important when you are trying to correctly tune your carb to achieve peak performance.
NOTE: The factory fuel line from the mechanical pump is roughly 1/16" smaller than Weber Regulator/Carb fuel line. Slight pressure is all that is needed to fit the smaller line. This gauge is intended to be used as a tool. Not for use in the cabin of the vehicle.
| Note: Images are for illustration purposes only. Images may not represent the product listed. Please contact customer service with any questions or concerns: 1-928-505-2501. |
- 1975-1980 20R 2.2L Engines
- 1981-1995 22R 2.4L Engines
Fuel Regulator
To open a printable PDF version of this instruction CLICK HERE
Specification Notes:
- This high quality adjustable fuel pressure regulator is adjustable from 1.5 - 20 psi.
- This regulator should be mounted on the firewall or the inner fender.
- Fuel hose size is 8mm or 5/16".
- In and out are marked on the housing.
- If you are using a liquid-filled gauge, gauge reading must be done when cold.
Installation:
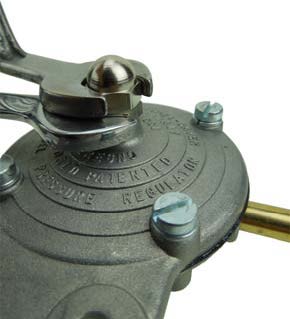
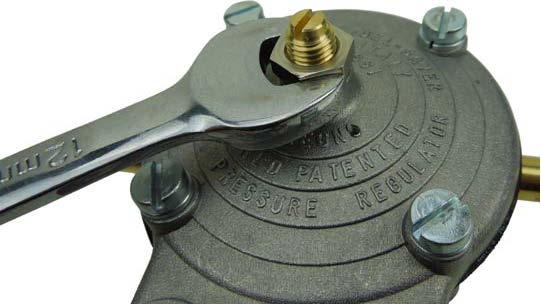
1. Remove cap using a 12mm wrench
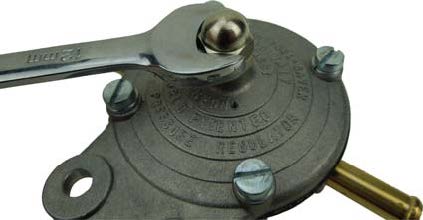
2. Loosen the locking nut at the bottom of the adjuster screw.
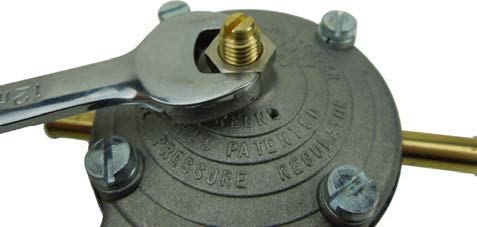
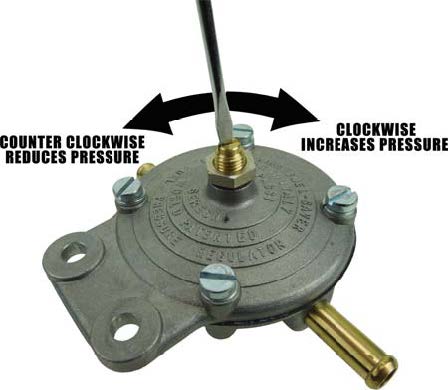
3. Using a flat screwdriver and a fuel pressure gauge, adjust the fuel pressure to the desire pressure. Turning screw clockwise will increase pressure, counter clockwise will decrease pressure. Adjust in half turn increments. Weber Carburetor recommended fuel pressure is between 2.5 psi. and 3 psi.
4. Lightly tighten the locking nut making sure the adjustment screw does not move.
5. Tighten the cap while holding the locking nut (the one on the bottom) with another 12mm wrench, so adjustment screw won't move.