


Disc Brake Conversion
(Rear)
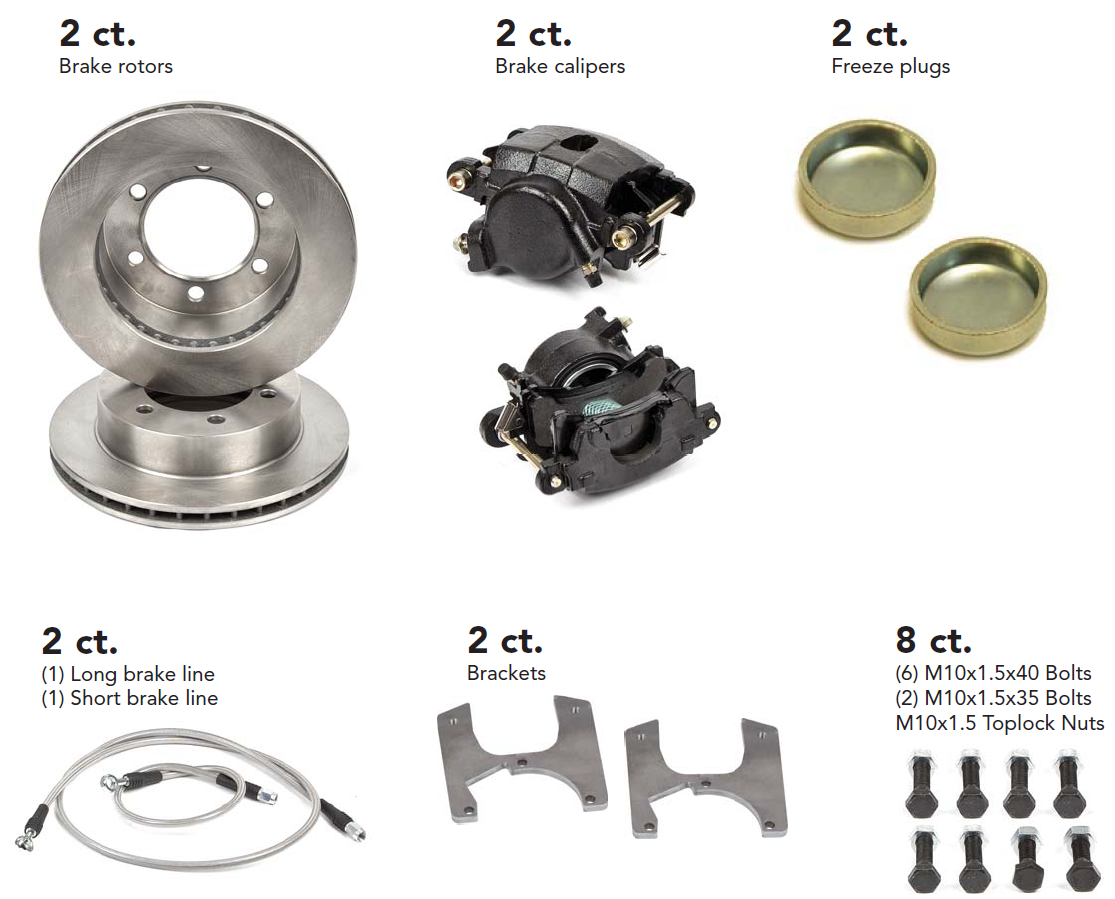
LC Engineering is proud to offer a rear disc brake conversion kit for your six lug Tacoma! This kit is strong, easy to install, and complete. It utilizes a 3/8" CNC laser cut caliper bracket with grade 10.9 bolts, the larger GM style calipers that are shipped fully loaded, and we included GM style vented rotors that were custom made just for this application. The brake lines are made so that one end fits the GM calipers and the other end attaches to your OEM Toyota brake lines, so no new fittings are required.
NOTE: This kit is for off road applications only. Your rear ABS sensor and emergency brake will have to be removed to install this kit, we recommend a simple line lock to be used as an emergency brake, though it should not be used as a parking brake if the vehicle is to be left unattended. Line locks can have a short bleed off time, it should be used to stop briefly on a trail or to set a wheel chock in place, see Part #: 1055435.
| Note: Images are for illustration purposes only. Images may not represent the product listed. Please contact customer service with any questions or concerns: 1-928-505-2501. |
by Trail-Gear
- 1995.5-2004 3RZ 2.7L Tacoma 6 Lug
- 1995-2004 5VZ 3.4L Tacoma 6 Lug
To open a printable PDF version of this instruction CLICK HERE
Tools Needed:
- ⅜" & ½" Ratchets
- ⅜" Allen sockets, 17mm, 19mm, 21mm Sockets
- 10mm, 11mm, 12mm, 14mm, 17mm Wrenches
- Hammer
- Floor Jack and Jack Stands
- Torque Wrench
- Press
- Bearing Puller
- Seal Puller
- Brake Fluid (DOT 3)
Installation Notes:
-
1. Read all instructions completely and carefully before you begin.
2. Check to make sure the kit is complete and that no parts are missing. If anything is missing, please contact Trail-Gear at (559) 252-4950.
3. Park vehicle on a clean, dry, at, level surface and block the tires so the vehicle can not roll in either direction.
NOTE: This installation removes your factory emergency brake. We strongly recommend installing an aftermarket e-brake or line lock. Your ABS sensor must also be removed in order to install this kit.
Installation Instructions:
1. Remove the wheels and drums from your vehicle.
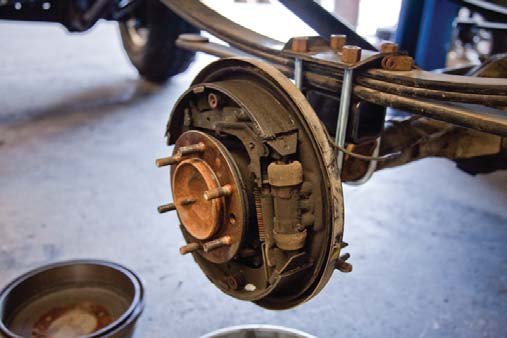
2. Disconnect the brake lines (10mm) and the e-brake cables.
3. Remove the 4 nuts holding bearing pocket in place on each side.
4. Slide the axle assemblies out of the housing. A small amount of gear oil may leak from the housing, so have a oil pan ready to catch the fluid.
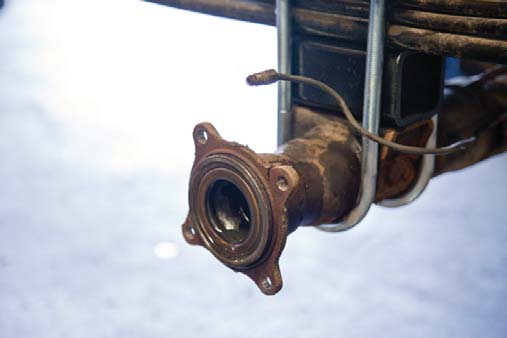
5. Remove ABS sensor so that bracket will clear and install the provided freeze plug into the ABS sensor hole.
6. If you are installing new Trail-Gear chromoly axles, bearing pockets and bearings, skip to step 8. If you are reusing your axle shafts, bearings, and bearing pockets, remove the bearing retaining ring from the axle.
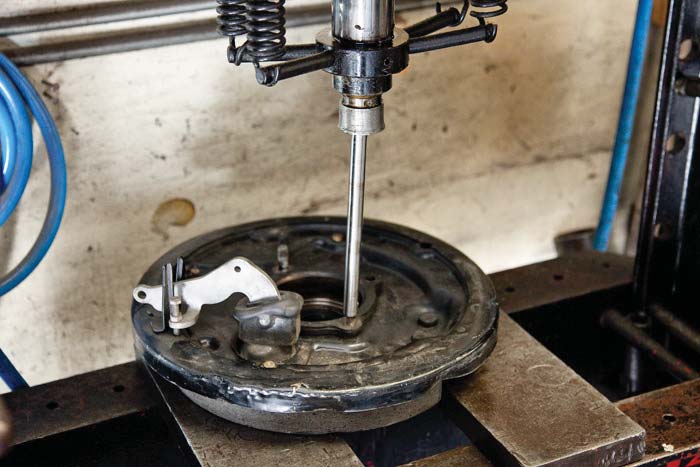
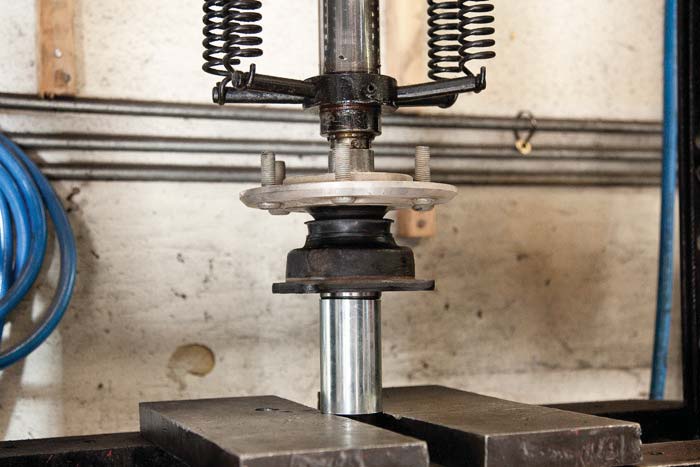
7. The drum brake assembly and backing plate should be removed with a press and a bearing puller according to your Toyota owners manual. If you do not have the correct tools or mechanical experience to complete this step we advise that you find a qualified automotive shop or an authorized Trail-Gear installer to complete this step for you in a safe and professional manner. If you have any questions about this step, please call Trail-Gear tech support at (559)252-4950.
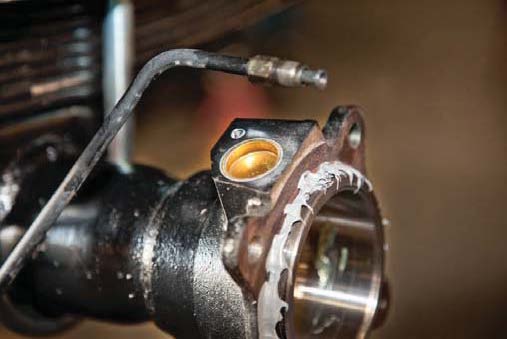
8. Press out the 4 studs holding the bearing pocket to the backing plate. Remove the old bearing and seal from the bearing pocket if you plan on installing new ones.
9. Install new seal and bearing in the bearing pocket and using a press, install the assembly on the axle. Install the bearing spacer and the snap ring on axle.
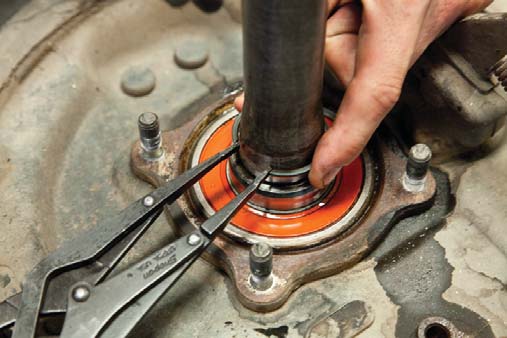
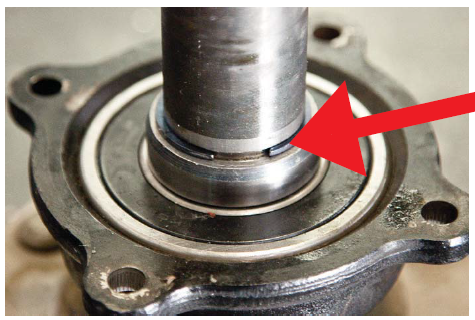
10. Install c-clip securely into groove. Take care to ensure that c-clip is completely seated in the groove.
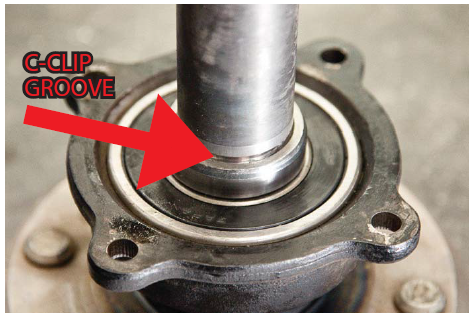
10. Continued
11. If you are installing new seals (recommended), remove the old o-ring from the axle housing and install new o-ring seal and oil seal.

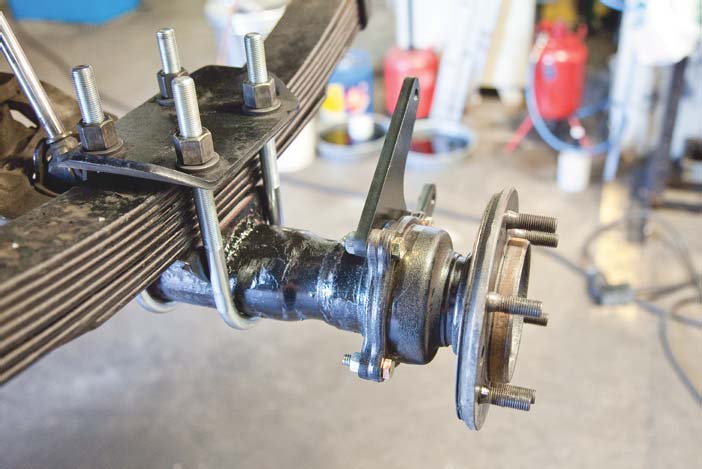
12. Install axle assembly into the axle housing.
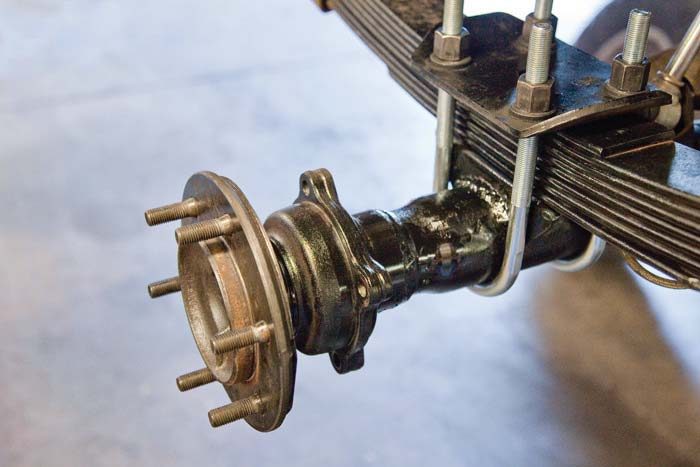
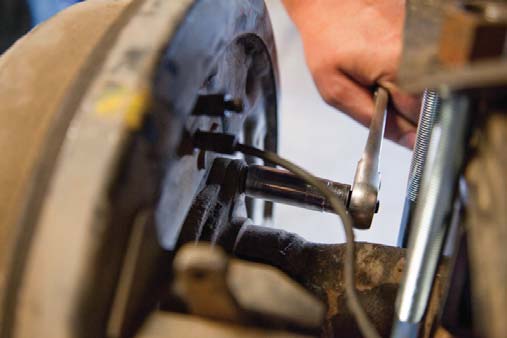
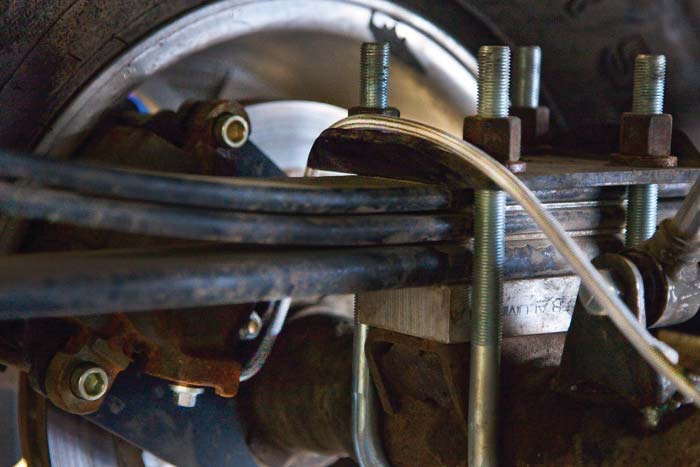
13. Using 3-M10x40mm bolts (per side), install the brake caliper bracket on the back side of the axle flange. The bracket needs to be clocked to the 2 o'clock position, or above the axle to the rear of the vehicle. The brake line enters the caliper from the bottom and the bleeder is on the top on both sides of the vehicle.
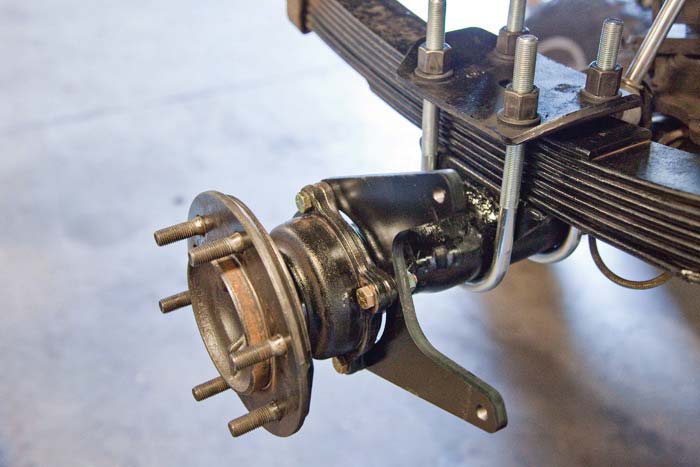
14. Install one M10x35mm bolt in the remaining hole on each side. Torque all M10 bolts to 45-50 ft-lbs.
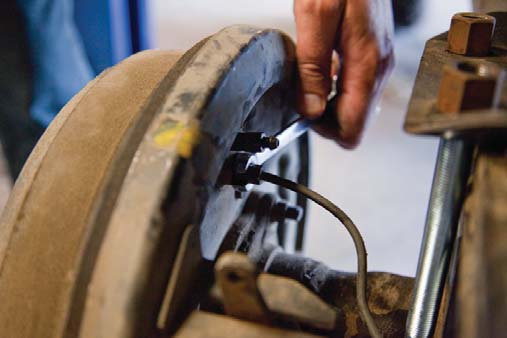
15. Place rotors over the wheel studs and install the calipers with the special fasteners that are supplied with the caliper. There is a right hand and a left hand caliper. The left side is shown, brake line on the bottom, bleeder on the top. Torque caliper bolts to 30-35 ft-lbs.
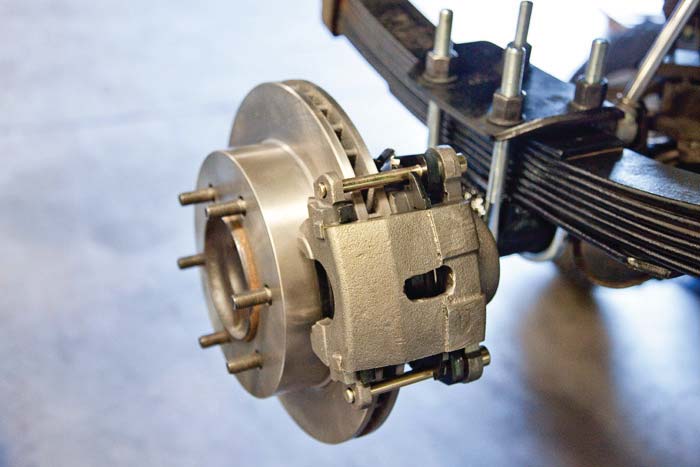
16. Install brake lines in calipers using the banjo bolt and 2 copper washers (1 per side) that were supplied with the caliper. The bend in the fitting needs to be facing up(away from the bolt head) so that the brake line can be routed over the leaf spring and on top of the axle.
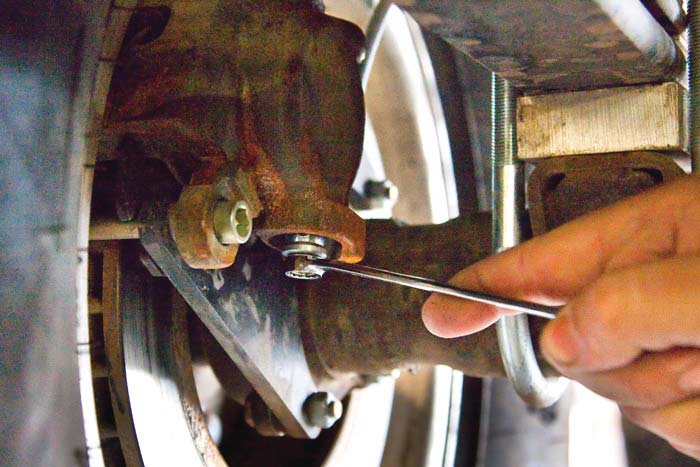
16 Continued - NOTE: If installing this kit with leaf springs, we recommend routing the brake line over the leaf spring pack and then covering the brake line with a piece of hose or flexible tubing to keep the brake like from chafing.
17. Install brake lines in the factory "T" mounted on the axle and secure the lines to the axle.
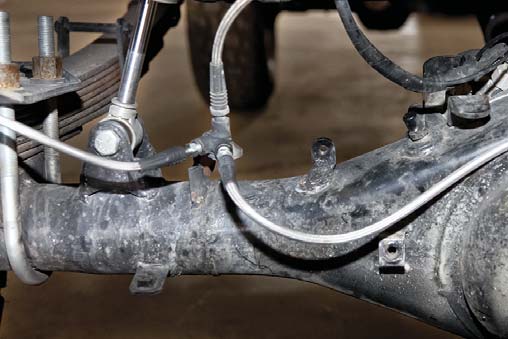
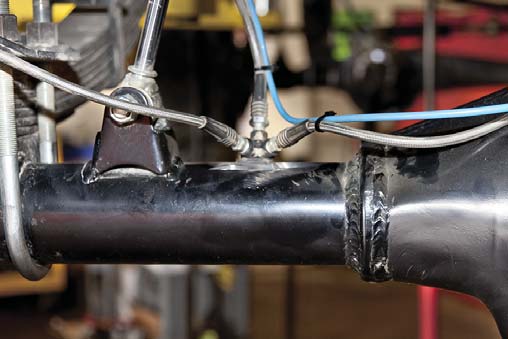
17. Continued - NOTE: When installing disc brake conversion kit brake lines onto a factory Tacoma "Y", the brake lines are exposed and could be damaged by rocks as shown in step 17. We recommend cutting the factory bracket off of the axle housing and rotating it back toward the front of the axle tube so that the brake lines are moved out of harms way. An example is shown below.
18. Install wheels and torque lug nuts.
19. Completely bleed brakes so that all air is removed from the system and test for leaks.
3 Reviews Hide Reviews Show Reviews
-
.
Slick kit. Easy to install. Looks great! Pleased as always!
-
Rear Disc Brakes Tacoma
Looks great no time to put them on yet.
-
Conversion kit
Super purchase on this disc brake conversion kit for my Toyota Tacoma Truck. Best price online I could find. Didn't know they made one of these kits.Very fast shipping also!! No problem install made my truck much safer to drive. Thanks DAVID