


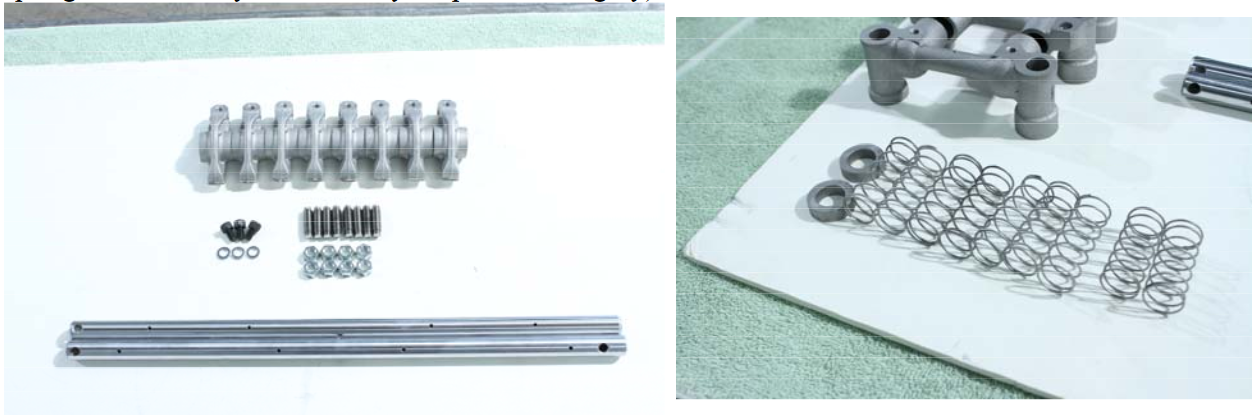
Pro Rocker Shaft Set
Since Toyota has discontinued the sale of its rocker shafts, we have been determined to bring an OEM or better quality shaft back to the market. We've partnered up with the original manufacturer in Japan to bring these shafts that follow all the exact OEM specs for the dimensions of the shaft, and added the touches that make our shafts the best!
The stock Toyota parts have two oiling holes on the bottom of the shafts and very shallow oiling grooves designed to transport oil throughout the rocker arm's bore. Since the stock shafts have proven to be insufficient at properly oiling in high RPM racing or hard duty applications, we're offering our Pro Rocker Shafts that are heat-treated, hard chromed with four large oiling holes as opposed to the two small holes found on the OEM shafts. These guarantee adequate oil delivery at all RPMs and loads. You can be confident that these shafts will be very durable with the thought, design, and treatments we've given them. Follow the guidelines below to determine if you need to replace your rocker shafts:
Subtract the shaft diameter measurement from the rocker arm diameter measurement to receive your oil clearance measurement. If the oil clearance is greater than maximum, replace the rocker arm and/or shaft.
- Rocker Shaft Diameter: 15.97 mm - 15.99 mm ( 0.6287 - 0.6295 )
- Standard oil clearance: 0.01 mm - 0.05 mm ( 0.0004" - 0.0020" )
- Maximum oil clearance: 0.08 mm ( 0.0031" )
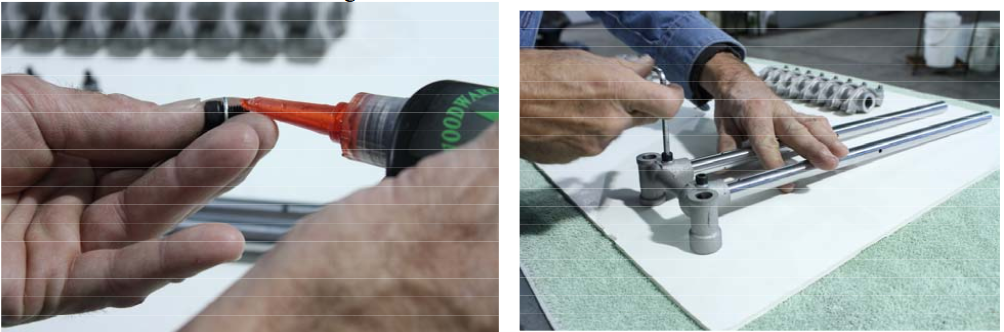
NOTE: Avoid the potential hazards of re-using your old worn down or insufficient components and upgrade to our premium rocker shafts. Exhaust shafts contain (1) bolt hole, intake shaft has (2) bolt holes (See illustration above).
This product should not be used in a manner that violates Federal EPA Laws.
Check out LCEngineering.com for New Products, Tech Articles, Specials & Monthly Newsletters!
| Note: Images are for illustration purposes only. Images may not represent the product listed. Please contact customer service with any questions or concerns: 1-928-505-2501. |
- 1975-1980 20R 2.2L Engines
- 1981-1995 22R 2.4L Engines
- 1983-1995 22RE 2.4L Engines
- 1985-1988 22RET 2.4L Engines
To open a printable PDF version of this instruction CLICK HERE
LC Engineering has put together this kit in order to replace your old and worn rocker arm assembly. It is recommended to replace rocker arms every time you replace the camshaft.
Installation (It is important to install in this order):
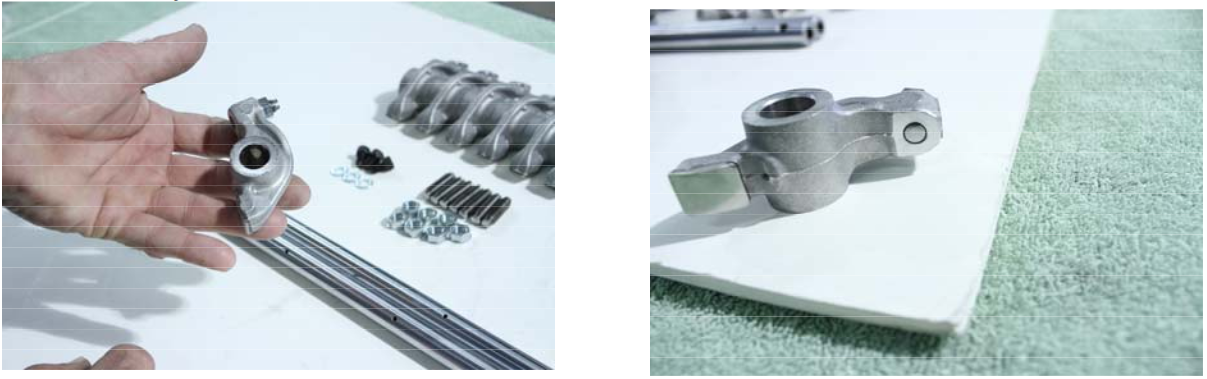
1. Before you start make sure you have all the components. (You will be re-utilizing your stock stands, spacers and springs. Make sure you clean all your parts thoroughly).
2. Align your stands, make sure all the arrows point in the same direction, to the front of the engine.

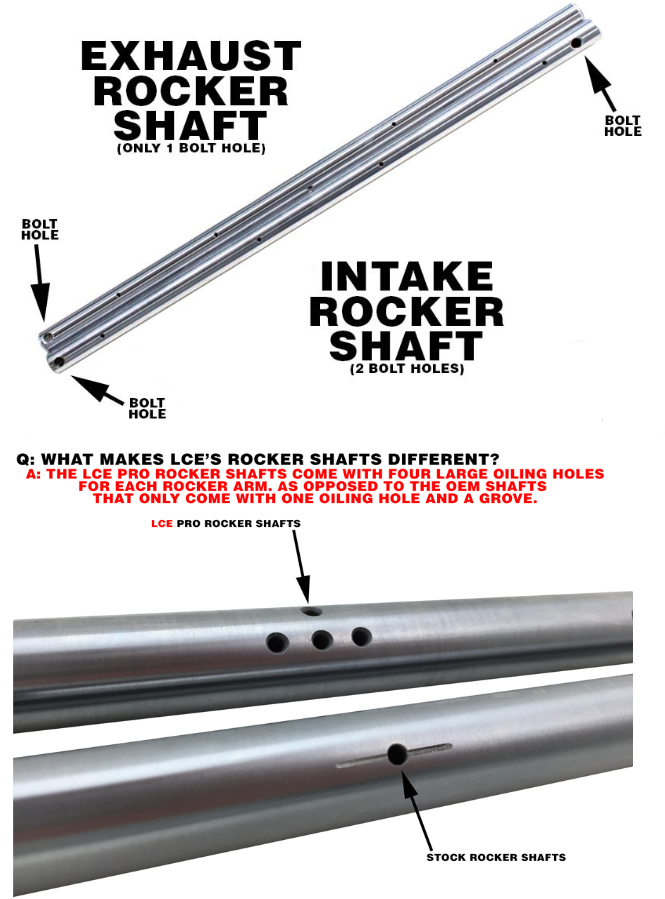
3. Install the valve adjust screw, with the flat side towards the valve tip. After that, install the nut on the upper part of the valve adjust screw.
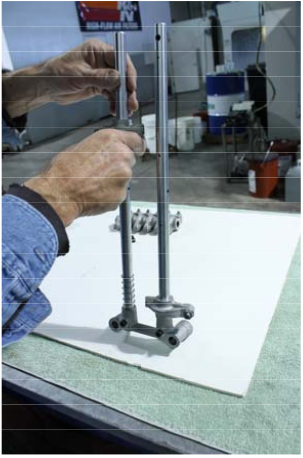
4. Proceed to install the shafts inside the stand # 1. The shafts will only line up with the stand one way , if they are reversed, they will not line up.

5. Loc-tite the allen bolts and using the zinc washers, screw them in to secure the shaft inside the stand
6. Following the pattern of the valves on the cylinder head install the first two springs and two rockers arms. (Alternating between spring and rocker arm) (This will be for cylinder #4).
7. Install the stand #2 (The one with the valve cover stud location holes)(Remember to keep all the arrows in the middle of the stands pointing towards the front side of the engine, which is towards the stand #5 which will be the last one to be installed). And proceed to install the other two springs and two rocker arms (For cylinder #3).
8.Before you install the stand #3 make sure you slide the round spacer on the intake side, right after the intake rocker arm for cylinder #3. Install stand #3 (The one with the oil passage in the middle), right after installing the stand #3 slide the other round spacer on the intake side, just before the intake rocker arm for cylinder #2. Proceed to install the next two springs and two rocker arms (For cylinder #2)
9.Install the stand #4 (The one that looks just like the #3 but with no oil passage on it) and proceed to install rocker arms and springs for cylinder #1.
10.Install the last stand, #5 (The one with only 1 hole for an allen bolt on the intake side and 2 valve cover stud locations) at the end of the shafts and screw the allen bolt in in order to secure the shaft in it.
11.Proceed to lube every rocker arm shaft by compresing the spring with the rocker arm and using a fine brush, apply engine oil or assembly lube uniformly.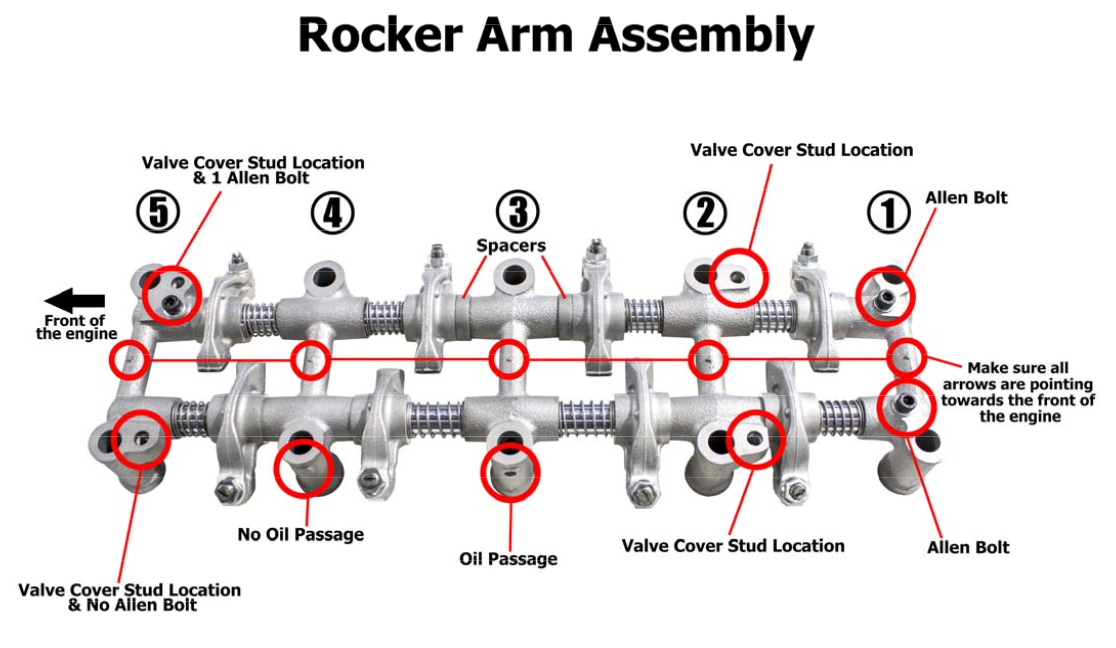
NOTE: Always use Cam Lube on Rocker Pads and Cam Lobes, proceed to follow camshaft break in procedure. Failure to follow these instructions explicitly may make installation more difficult. We strongly urge you to read and understand these directions, and follow them directly.
13 Reviews Hide Reviews Show Reviews
-
Lubrication is key
This is a great upgrade to keep your rockers hydrated and cool. It's the little things that keep your engine running better and longer.
-
Exact as advertised
Great products, great company. Thanks!
-
Mmmmmh, lubey
Found a smoked camshaft and some scarring inside the rockers upon disassembly. Happy to get additional flow out of these to squirt on the cam lobes, etc.
-
Rena Gracey give 5 stars
-
Maybe I won't round off the cam this time
I just gotta put countertops on in the kitchen then I'm allowed to finish it..
-
Rocket shafts
High quality product .
-
Good stuff
.
-
Great guys
Great guys? I have had to call them in the past to get help deciding what I should do. I really appreciate that they are willing to take the time to talk to you like a smaller company would, but they're large enough to source and improve products based upon their experience. I really appreciate that service and quality. Next item on the list is distributor, I'm not even going to bother looking elsewhere.
-
Can't not have this with a new cam
Another necessity if your doing all these upgrades! More lube, less likely it's gunna poo itself!

