


Rock Ripper Extreme Air Intake
Replace your restrictive factory air filter/box and boost your engine's performance with the Rock Ripper™ Performance Line Extreme Air Intake System.
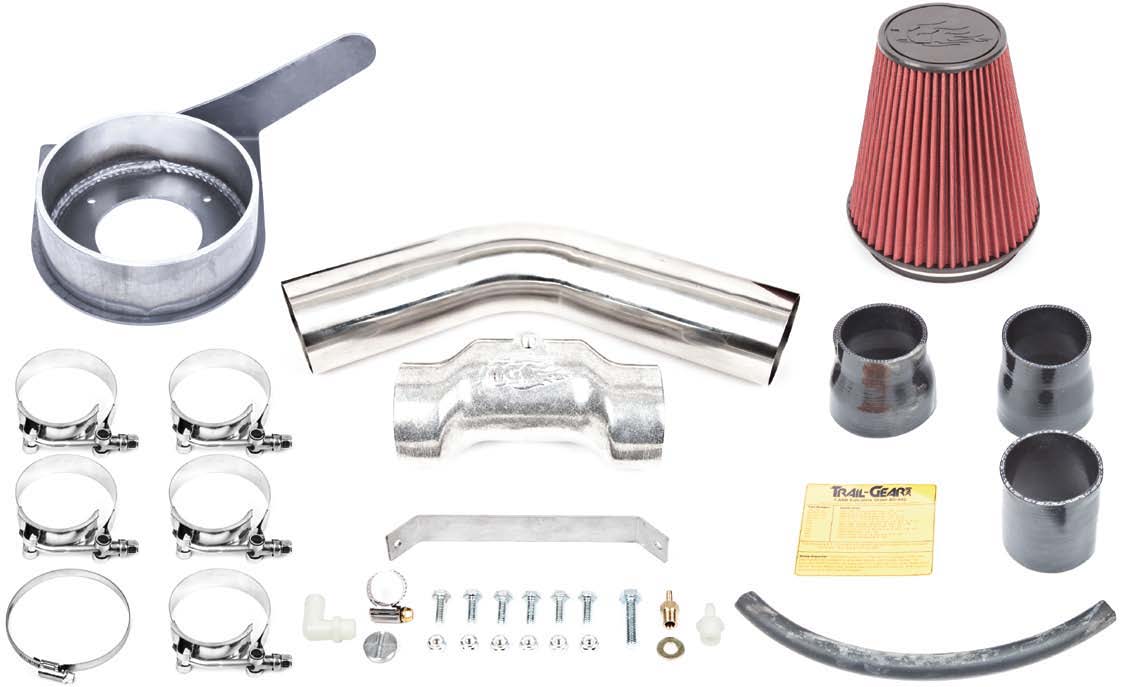
Features:
- Polished stainless steel intake tubing and cast aluminum filter bracket with large, high-performance air filter charger.
- Vastly increased filter surface area helps keep you trail-running longer in dusty off-road environments.
- Greatly increased air flow allows for a quicker throttle response.
- Pre-oiled cotton cloth filtration material drastically improves filtering quality
- All hose clamps, brackets and silicone adapters included
- Air Filter is washable and reusable
- Street & Emission Legal in all 50 US States. Comes with California Air Resources Board exemption sticker.
- Up to an extra 5 HP and increase of up to 5 ft-lbs in torque.
- Installation manual with easy bolt on steps.
NOTE: Any variations of parts from what is provided will void the 50-state smog certificate. For replacement Filter, see Part # 1034038 and for Pre-Charger Filter, see Part # 1061591.
This product should not be used in a manner that violates Federal EPA Laws.
Check out LCEngineering.com for New Products, Tech Articles, Specials & Monthly Newsletters!
| Note: Images are for illustration purposes only. Images may not represent the product listed. Please contact customer service with any questions or concerns: 1-928-505-2501. |
by Trail-Gear
- 1995.5-2000 3RZ 2.7L Tacoma Engines
- 1995.5-2000 3RZ 2.7L 4Runner Engines
To open a printable PDF version of this instruction CLICK HERE
Tools Needed:
- Flathead Screwdriver
- Drill & 5/16" Drill Bit
- Ratchet & Socket set
- Adjustable Wrench
Installation Notes:
-
1. Read all instructions completely and carefully before you begin.
2. Check to make sure the kit is complete and that no parts are missing. If anything is missing, please contact Trail-Gear at (559) 252-4950.
3. Park vehicle on a clean, dry, at, level surface and block the tires so the vehicle can not roll in either direction.
4. Any variation from these instructions or parts will void the 50-state smog legal certification.
Installation Instructions:
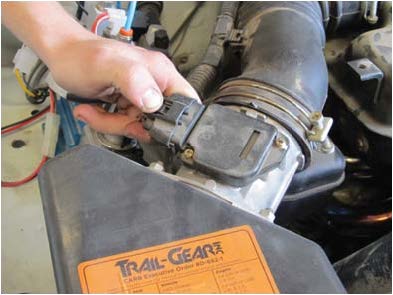
1. Disconnect the Mass Airflow Sensor harness from the
Mass Airflow Sensor.
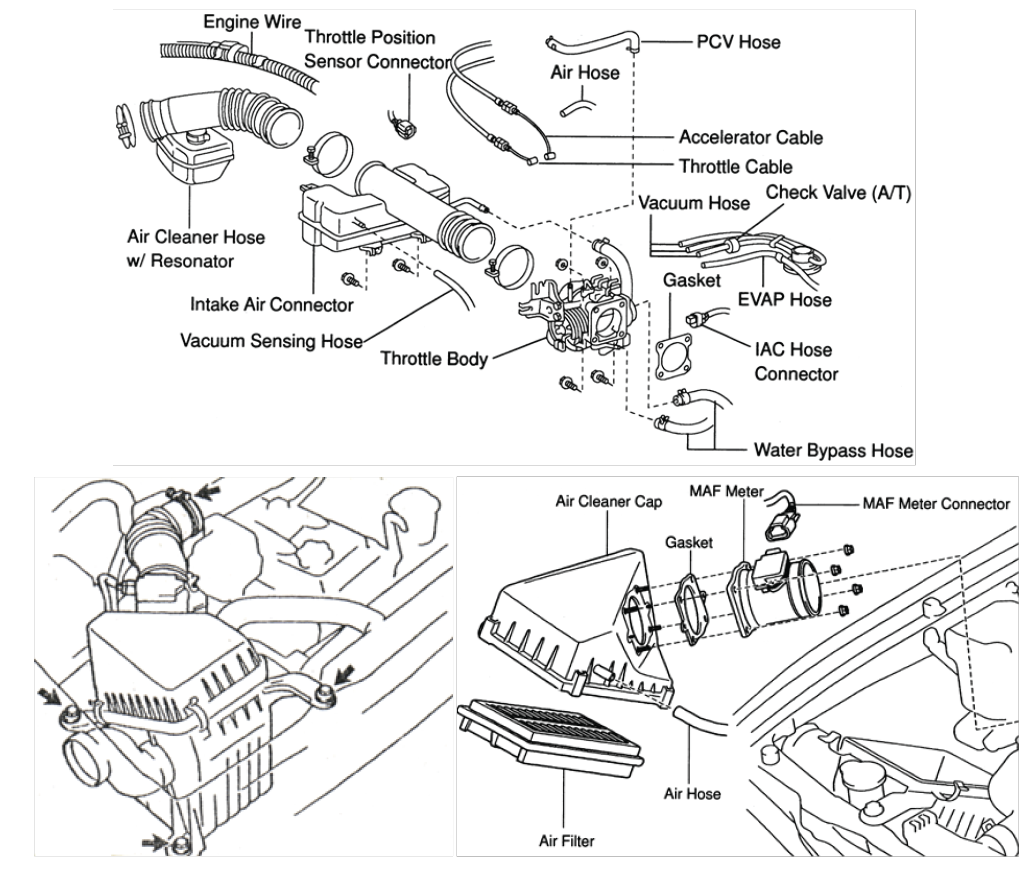
2. Disconnect all hoses and air ducting between the engine and the stock Air Cleaner.
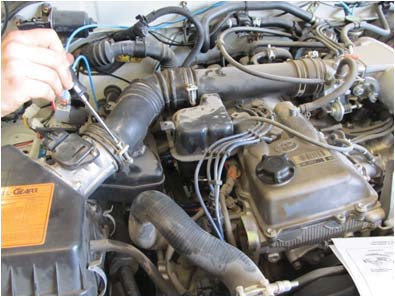
3. Unbolt and remove the entire Air Cleaner, Mass Airflow Sensor, Intake Air Connector, and Air Cleaner Hose with Resonator from the vehicle. Save the Mass Airflow Sensor and rubber gasket for re-installation.
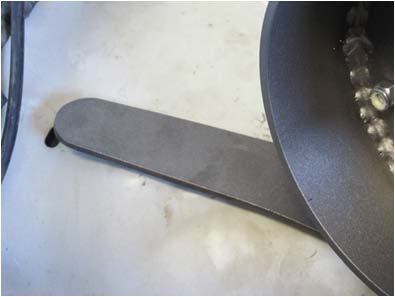
4. Position the new Air Intake Bracket into the stock Air
Cleaner's mounting location. Align the long mounting
leg of the new Air Intake Bracket with the original Air
Cleaner's rear mounting hole. Mark this location on the
Air Intake Bracket. Remove the Air Intake Bracket and
drill a 5/16" diameter hole in the marked location on
the Air Intake Bracket. Note: It might be necessary to
mock up the Stainless Steel Air Tube, Cast Aluminum
Air Tube, & Silicone Adapters in order to position the
Air Intake Bracket correctly.
5. Position the Air Intake Bracket back into the vehicle
and secure using the stock bolt or the M8 Bolt & 5/16"
Washer provided.
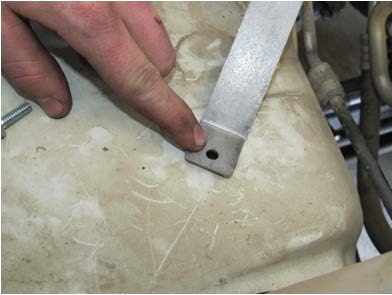
6. Align the steel Support Bracket with the mounting hole in the Air Intake Bracket and against the flat spot on the inner fender panel. Mark the location and drill a 9/32" diameter mounting hole at the marked location on the inner fender panel. NOTE: In some instances, the support bracket may need to be slightly bent to align with the fender panel correctly.
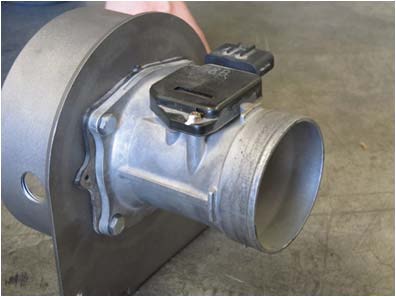
7. Attach the Mass Airflow Sensor & rubber gasket removed in Step 3 to the back of the Air Intake Bracket using (4) of the ¼" bolts and nuts provided.
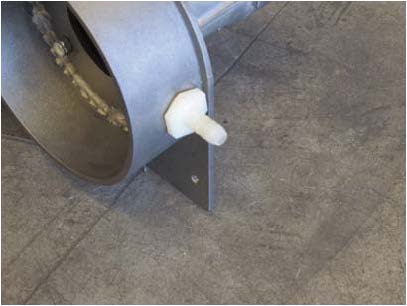
8. If the vehicle is installed with a charcoal canister, install the Nylon 3/8" Barbed x ½" NPS Fitting into the corresponding ½" NPS hole in the Air Intake Bracket. If the vehicle is not equipped with a charcoal canister, install the ½" NPS plug into the ½" NPS hole in the Air Intake Bracket.
9. Mount the Air Intake Bracket and the Support Bracket back into the vehicle and secure using the remaining (2) ¼" Bolts & Nylock Nuts.

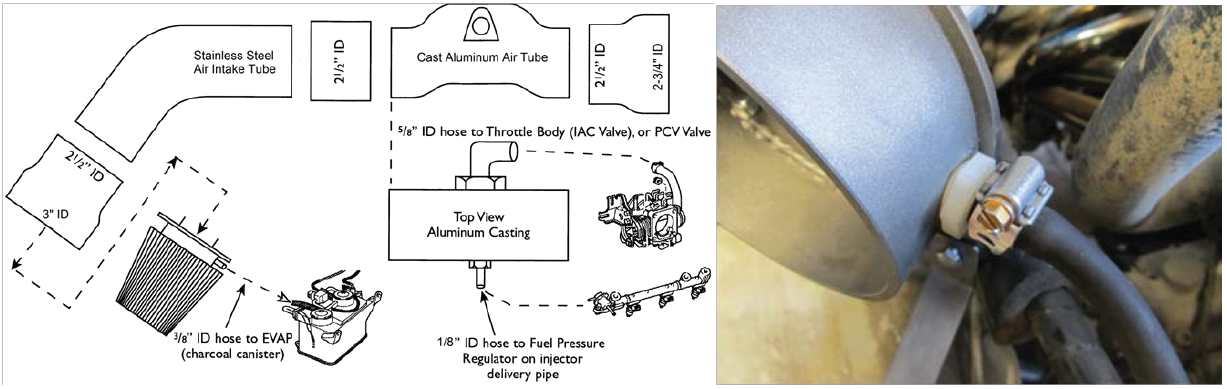
10. Install the Stainless Steel Air Tube, Cast Aluminum Air Tube, Silicone Adapters, Fittings, & Hose Clamps per the diagram below. Note: If the stock hose coming from the Charcoal Canister is too short, replace it with the 11" long piece of 3/8" I.D. Rubber Tubing provided and secure it to the 3/8" Barbed Fitting on the Air Intake Bracket with the 5/8" Hose Clamp provided.
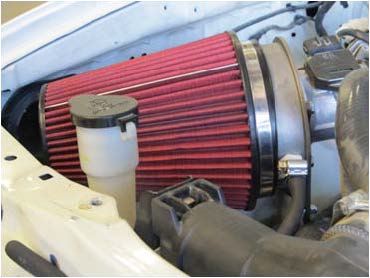
11. Install the Air Filter onto the Air Intake Bracket and
secure the hose clamp provided on the Air Filter.
12. Connect the Mass Airflow Sensor Harness to the Mass Airflow Sensor.

13. Apply the provided C.A.R.B. decal to the underside of the hood.
14. Start the vehicle. If the Check Engine light stays lit, stop the engine and disconnect the battery. This will reset the engine computer and turn off the Check Engine light.
15. As needed, wash & re-oil the Air Filter using a commercially-available reusable filter recharger kit.

