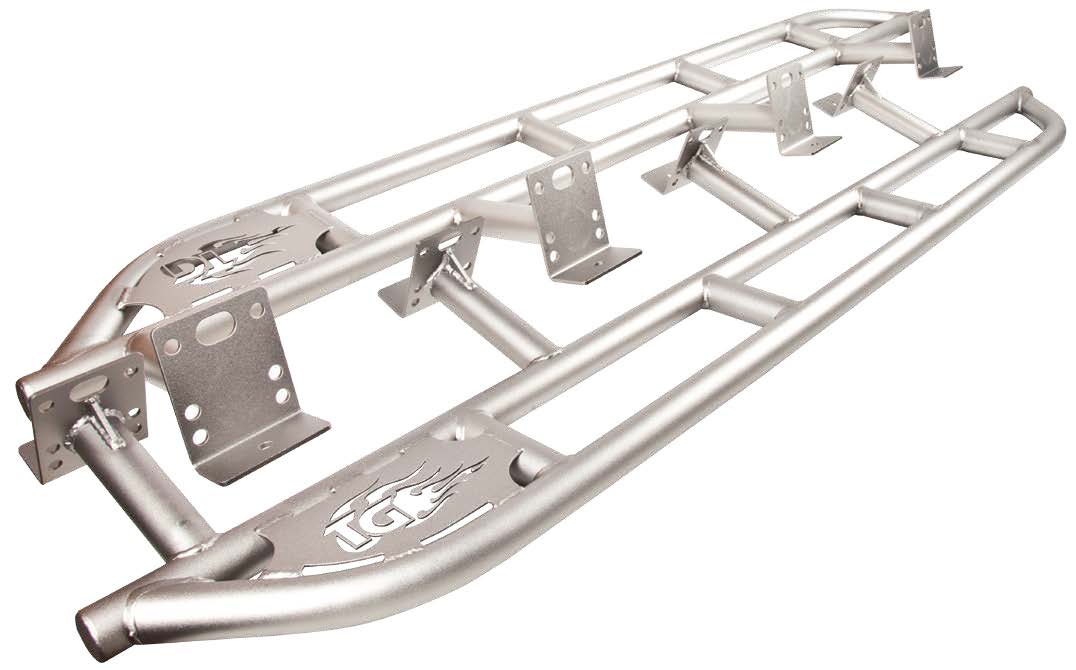
Rock Sliders
(Bolt-on)
Trail-Gear now offers fully welded Rock Slider kits for Tacoma Extra-cab Pickups. Made from 1 3/4" X .120" wall DOM tubing. Kit includes 4 legs with gussets on each slider for easy, bolt-on installation. We recommend welding bars directly to the frame. Includes installation hardware.
NOTE: Sold as a pair (78" long). This application will not fit Regular Cab or Double Cab Long Bed models. Sliders are shipped raw and ready to customize with the surface treatment of your choice.
| Note: Images are for illustration purposes only. Images may not represent the product listed. Please contact customer service with any questions or concerns: 1-928-505-2501. |
by Trail-Gear
- 2008-2012 Tacomas (Extra Cab)
To open a printable PDF version of this instruction CLICK HERE
Tools Needed:
- ¾" Wrench (open or boxed end)
- Ratchet & ¾" Socket
- Drill & ¼" / ½" Drill Bits
- Center Punch
- Hammer
- Marking Pen
- Floor Jack
- 2x C-Clamps
Installation Notes:
-
1. Read all instructions completely and carefully before you begin.
2. Check to make sure the kit is complete and that no parts are missing. If anything is missing, please contact Trail-Gear at (559) 252-4950.
3. Park vehicle on a clean, dry, at, level surface and block the tires so the vehicle can not roll in either direction.
4. This kit is for off-road use only. The installation of this kit may adversely affect the on-road handling characteristics of your vehicle. It is recommended that the installation steps below be performed by a competent mechanic. Buyers and users of this product hereby expressly assume all risks associated with the installation and use of this kit.
Installation Instructions:
-
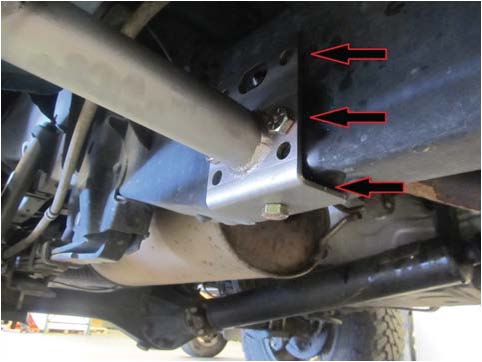
1. Position Rock Sliders on frame. Note rivet on frame
where rear most leg and mounting bracket land.
Center rivet in slot at the top of mounting bracket,
adjust forward or backward in order to center rock
sliders between wheel openings.

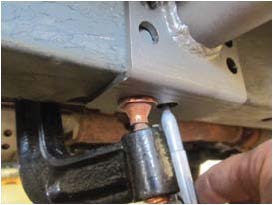
2. Clamp Rock Sliders in place using C-Clamps (if necessary use floor jack on front leg in order to achieve complete contact with the bottom of the frame).
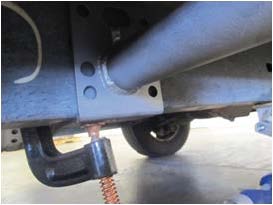
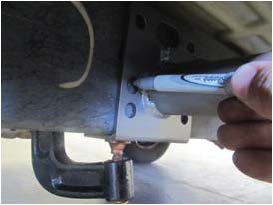
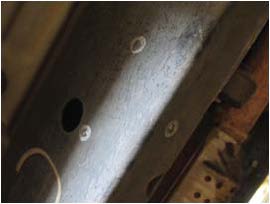
3. Using an Ink pen mark holes to be drilled (see pictures below) for correct holes.
4. Remove rock sliders from frame.
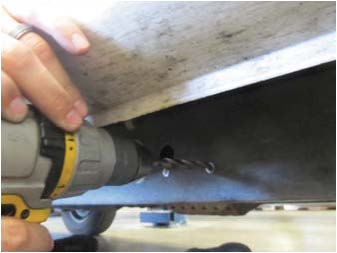
5. Use a center punch to mark the center of hole to be drilled.
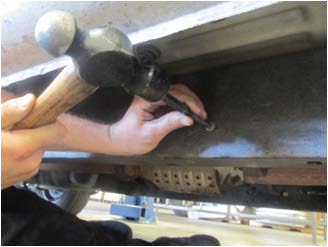
6. Use ¼" drill bit to drill pilot holes in frame.
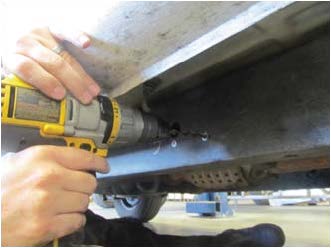
7. Use ½" drill bit to drill final holes in frame.
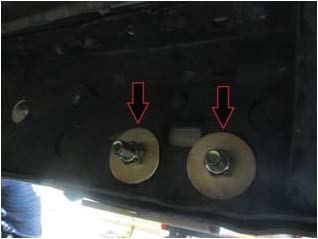
8. Repeat Step 2 and continue to bolt on sliders using provided Hardware. ( All washers to be used on the inside of the frame, small washers to be used on the bottom bolts and large washers to be used on side bolts, Large 6" bolts to be used on the mounting bracket closest to the front of the vehicle, front mounting bracket does not use a bottom bolt.)
9. Repeat Steps 1-8 on other side of vehicle. For Hardcore Off-Road Adventures Trail-Gear Inc. Recommends that you weld on your Rock Sliders. See picture for recommended location of welds. (Weld down both sides of mounting bracket, along the side of the frame and on the bottom of the frame). Any additional welding may be done at the owner's discretion.