
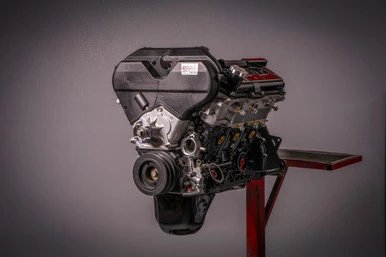
5VZ-FE Engine Installation Checklist: 17 Steps Before the Engine Goes In
Posted by LC Engineering on Nov 21st 2026
An LCE 5VZ-FE long block arrives assembled from valve cover to oil pan, with a new Aisin timing belt kit and water pump already installed. The intake manifolds, sensors, injectors and accessories transfer from your old engine. Everything below is work that is far easier on an engine stand than in the engine bay, and several of these items are the difference between a clean startup and pulling the intake back off a week later. Work top to bottom; the order is deliberate.
Read the whole list before you begin, lay out your new parts, and keep the factory service manual (FSM) open for torque values and sequences. Where we give a torque figure, treat it as a reference and confirm it against the FSM for your model year.

Fits: 1995-2004 Tacoma, 1996-2002 4Runner, 1995-1998 T100, 2000-2004 Tundra (3.4L 5VZ-FE)
Time: 4 to 6 hours on a stand
Before you start, photograph your old engine from every side before it comes apart. Those photos are the best reference you will have for harness and hose routing.
Have These on Hand
- Toyota FIPG, Permatex Ultra Grey or The Right Stuff sealant
- Carburetor or brake cleaner and lint-free rags
- Wire brush or wire wheel
- Torque wrench covering both in-lb and ft-lb ranges
- New coolant, oil and an oil filter for the first fill
- Fresh O-rings and gaskets (see the parts reference below)
- Assembly lube or clean engine oil for O-rings
- The FSM engine mechanical section for your truck
Clean Everything, Twice
Every casting that comes off your old engine (intake manifolds, oil cooler, water outlet, thermostat housing) goes back on clean. Carbon, old sealant and coolant scale are the most common causes of leaks and vacuum faults on a fresh install. Blow out every passage and make sure nothing is left inside a manifold before it is bolted to a head. Heavy scale or pitting on coolant parts is often a sign of electrolysis; our article on testing for electrolysis explains how to check before the new engine sees that coolant.
The Sequence: 17 Steps
1. Install a New PCV Valve
Fit the new valve into the driver-side valve cover grommet. If the grommet is hard or cracked, replace it at the same time.
Parts: PCV valve 12204-62010 (supersedes 12204-62030), PCV grommet if needed
2. Clean and Install the Knock Sensors and Harness
The knock sensors sit in the valley of the block, under the lower intake. This is your only easy access, so do it now. Clean the seats so the sensors bottom out squarely, and torque to 29 ft-lb (39 N·m). Route the harness along its original path and seat every clip.
The harness clips almost always break during removal from the old engine. Inspect them, and if any are broken or the insulation is brittle, replace the harness rather than tape it. A knock sensor fault will cost you timing retard and a check engine light.
Parts: knock sensor 89615-12040 (2), knock sensor harness 82219-35010 (verify by VIN)
3. Install the Water Bypass Tube
The bypass tube lives under the intake and is a known corrosion point. We strongly recommend replacing it while it is accessible. Feed the new tube in from the rear of the engine and walk it forward into position; forcing it in from above bends the flanges.
Toyota uses no gasket at the flange. Lay a small continuous bead of FIPG, Ultra Grey or The Right Stuff on a clean, dry flange face, assemble within the sealant's skin time, and bolt it down with the original fasteners, torqued per the FSM. Wipe any squeeze-out from inside the coolant passage.
Parts: water bypass pipe 16268-62060, new bypass hoses and clamps as required
4. Install the Lower Intake Manifold
Clean the manifold thoroughly, inside and out, before it goes near the heads. Fit new gaskets, set the manifold down square, then tighten the original fasteners in the FSM sequence (from the center outward, in two or three passes) to 13 ft-lb (18 N·m).
Parts: intake manifold to head gaskets 17177-62060 (2), supplied with your engine and also sold as our 5VZ intake manifold gasket set
5. Install the Camshaft Position Sensor
Remove the upper timing belt covers and fit the sensor. If the sensor or its harness is questionable, replace it now, because it is inaccessible once the covers are on.
Route the harness behind the timing belt and clip it to the backing plate. Before the cover goes back on, tug the harness in every direction and confirm no part of it can reach the belt. Reinstall the covers.
Parts: camshaft position sensor 90919-05026, O-ring 90099-14090 (verify)
6. Install a New Thermostat and Seal
Fit the new thermostat with its jiggle valve at the top of the housing bore, using a new rubber seal. Inspect the housing: if the sealing face is pitted or the casting is scaled from corrosion, replace it. A corroded housing will not seal against a new thermostat.
Parts: 5VZ thermostat, 180°F (82°C) (Toyota 90916-03075), thermostat seal (Toyota 16325-62010), housing 16321-62020 if required

7. Install the Crankshaft Position Sensor
Clean the mounting boss and the sensor tip. A film of oil-borne metal debris on the pickup will give you a rough, wandering idle signal. Fit a new O-ring, lubricate it with clean oil, and snug the bolt to 74 in-lb (8.4 N·m).
Parts: crank position sensor 90919-05020
8. Install the Oil Dipstick Tube
Clean the tube inside and out, fit a new O-ring at the block, oil it, and push the tube home without twisting. Bolt the bracket down last so the tube is not preloaded.
9. Install the Block Coolant Drain (Passenger Side)
Coat the threads with a high-temperature thread sealant and install the drain on the passenger side of the block.
10. Install the Oil Filter Adapter and a New Filter
Wire-brush the threads clean and dry, check the adapter's sealing face for burrs, and torque per the FSM. Oil the new filter's gasket and spin it on by hand.
Parts: oil filter 90915-YZZD3 (verify for your year). See all 5VZ oiling parts.
11. Clean and Install the Oil Cooler
The cooler must be cleaned before installation. Flush it with carburetor or brake cleaner until what comes out is clear, then blow it dry with compressed air. Any sludge left inside goes straight into your new bearings. Fit new sealing rings and torque the union per the FSM.
12. Install the Water Outlet Fitting and Oil Cooler Hoses
Replace the oil cooler hoses and clamps as a matter of course. On the 5VZ these are coolant hoses feeding the oil cooler; they are twenty-plus years old, they sit where you cannot reach them once the engine is in, and a failure dumps coolant and can overheat a brand new engine. Clean the outlet's sealing face and fit a new gasket.
Parts: oil cooler hoses and clamps (vehicle specific, confirm by VIN). See 5VZ hoses and 5VZ cooling parts.
13. Install New Engine Mounts
New mounts, every time. Old collapsed mounts change driveline angles and telegraph every vibration into the cab, and swapping them later means lifting the engine again. Mount part numbers differ by model, year and drivetrain, so order by VIN.
Parts: OEM 5VZ motor mounts (1998-2002 4Runner, 1999-2003 Tacoma), or browse all 5VZ motor mounts and swap parts
14. Install the Fuel Injectors and Rail
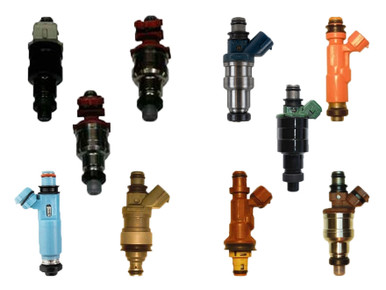
We recommend having your OEM injectors cleaned, flow tested and resealed before they go into a fresh engine. Send them to us through our Fuel Injector Service: each set is ultrasonically cleaned, flow matched and returned with new O-rings, grommets, isolators and pintle caps.
Fit new upper O-rings, grommets and lower insulators, lubricate the O-rings with light oil (never silicone grease), and rotate each injector after seating to confirm it turns freely. Torque the rail bolts evenly to 15 ft-lb (21 N·m).
Parts: injector O-ring 90301-07001 (6) and grommet 23291-62010 (6), supplied with your engine. Replacement injectors if needed: 23209-62030 (1995-1998) or 23209-62040 (1999 and later).
15. Install the Upper Intake
Clean it properly. Carbon in the plenum and a gummed throttle bore are the two things you will regret leaving. Fit a new gasket, then tighten in the FSM sequence to 13 ft-lb (18 N·m). Check that every vacuum port has either its hose or a cap.
Parts: upper intake (plenum) gasket, supplied with your engine; 5VZ throttle body gasket if you remove the throttle body to clean it
16. Replace Wear Items While Access Is Good
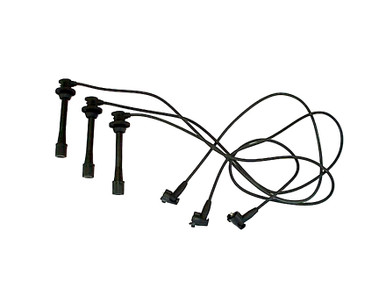
Strongly advised now rather than later: spark plugs, spark plug wires, spark plug tube seals, vacuum hoses and heater hoses. Our Denso 5VZ spark plug wire set is a direct OE replacement; see all 5VZ ignition parts.
17. Final Walk-Around Before the Engine Goes In
Turn the crank two full revolutions by hand and feel for interference. Confirm every sensor is plugged in and every connector is locked. Check that no harness touches the timing belt, the exhaust or a moving accessory. Count your fasteners and your tools. Then lift it in.
Parts Reference
Numbers below are for the 5VZ-FE and are given for reference only. Toyota supersedes part numbers often, and some items differ by model year and market. Always confirm by VIN with your dealer or with us before ordering.
| Item | Part number | Qty | Note |
|---|---|---|---|
| PCV valve | 12204-62010 | 1 | Supersedes 12204-62030 |
| PCV grommet | 90480-19011 | 1 | Already on your engine |
| Knock sensor | 89615-12040 | 2 | 29 ft-lb |
| Knock sensor harness | 82219-35010 | 1 | Verify by VIN |
| Water bypass pipe | 16268-62060 | 1 | No gasket, use FIPG |
| Intake manifold gasket | 17177-62060 | 2 | Manifold to head, supplied with your engine |
| Camshaft position sensor | 90919-05026 | 1 | Behind the timing cover |
| Crank position sensor | 90919-05020 | 1 | New O-ring |
| Thermostat, 82°C | 90916-03075 | 1 | Jiggle valve up |
| Thermostat seal | 16325-62010 | 1 | Verify |
| Thermostat housing | 16321-62020 | 1 | Only if corroded |
| Oil filter | 90915-YZZD3 | 1 | Verify for year |
| Injector O-ring (upper) | 90301-07001 | 6 | Supplied with your engine |
| Injector grommet | 23291-62010 | 6 | Supplied with your engine |
| Fuel injector | 23209-62030 / 23209-62040 | 6 | 1995-1998 / 1999 and later, only if replacing |
| Valve cover gasket | 11213-62020 | 2 | Already on your engine |
| Engine mounts | By VIN | 2+ | Model and drivetrain specific |
| Oil cooler hoses and clamps | By VIN | Set | Replace as a set |
| Upper intake gasket | By VIN | 1 | Supplied with your engine |
Torque Quick Reference
| Knock sensor | 29 ft-lb / 39 N·m |
| Lower intake manifold | 13 ft-lb / 18 N·m |
| Upper intake / plenum | 13 ft-lb / 18 N·m |
| Water bypass pipe | Per the FSM |
| Fuel rail bolts | 15 ft-lb / 21 N·m |
| Crank sensor bolt | 74 in-lb / 8.4 N·m |
Reference values only. Confirm every figure against the factory service manual for your engine and model year.
Questions During the Build?
Contact our tech team before you improvise. A five minute conversation is cheaper than pulling an intake manifold twice. Everything for this job is in our 5VZ-FE parts section, including 5VZ crate engines and long blocks, rebuild kits, gaskets and seals and fuel injection parts.